Basic Flutter Animations With Tweens

In Flutter we create animations with the Animation class, which is part of the Flutter animation framework. We can use animations to change the size, position, color, opacity, and other properties of widgets in response to user input or other events. Flutter provides a variety of animation classes and widgets that make it easy to create complex animations with relatively little code.
Tweens
A Tween is an interpolation between two values of the same type. For example, we can use a Tween<double> to interpolate between two double values. A tween defines the starting and ending values of an animation, and the animation framework takes care of interpolating between those values over time. The Tween class provides several methods for creating common types of tweens, such as Tween<double>, Tween<Color>, and Tween<Offset>.
Basic Animation Example
This Flutter animation uses a Tween to interpolate between the beginning and ending values of a double. The animation is controlled by an AnimationController and changes the opacity of a FlutterLogo widget over a duration of two seconds. We use the addListener method to rebuild the widget tree with the new opacity value for each frame of the animation. It calls the repeat method on the AnimationController to make the animation repeat indefinitely in the reverse direction.
See the live sample here.
import 'package:flutter/material.dart';

void main() => runApp(const MyApp());

class MyApp extends StatefulWidget {
  const MyApp({Key? key}) : super(key: key);

  @override
  State<MyApp> createState() => _MyAppState();
}

class _MyAppState extends State<MyApp> with SingleTickerProviderStateMixin {
  late AnimationController _controller;
  late Animation<double> _animation;

  @override
  void initState() {
    super.initState();
    _controller = AnimationController(
      duration: const Duration(seconds: 2),
      vsync: this,
    );
    _animation = Tween<double>(begin: 0, end: 1).animate(_controller)
      ..addListener(() {
        setState(() {});
      });
    _controller.repeat(reverse: true);
  }

  @override
  Widget build(BuildContext context) {
    return MaterialApp(
      home: Scaffold(
        body: Center(
          child: Opacity(
            opacity: _animation.value,
            child: const FlutterLogo(size: 200),
          ),
        ),
      ),
    );
  }

  @override
  void dispose() {
    _controller.dispose();
    super.dispose();
  }
}
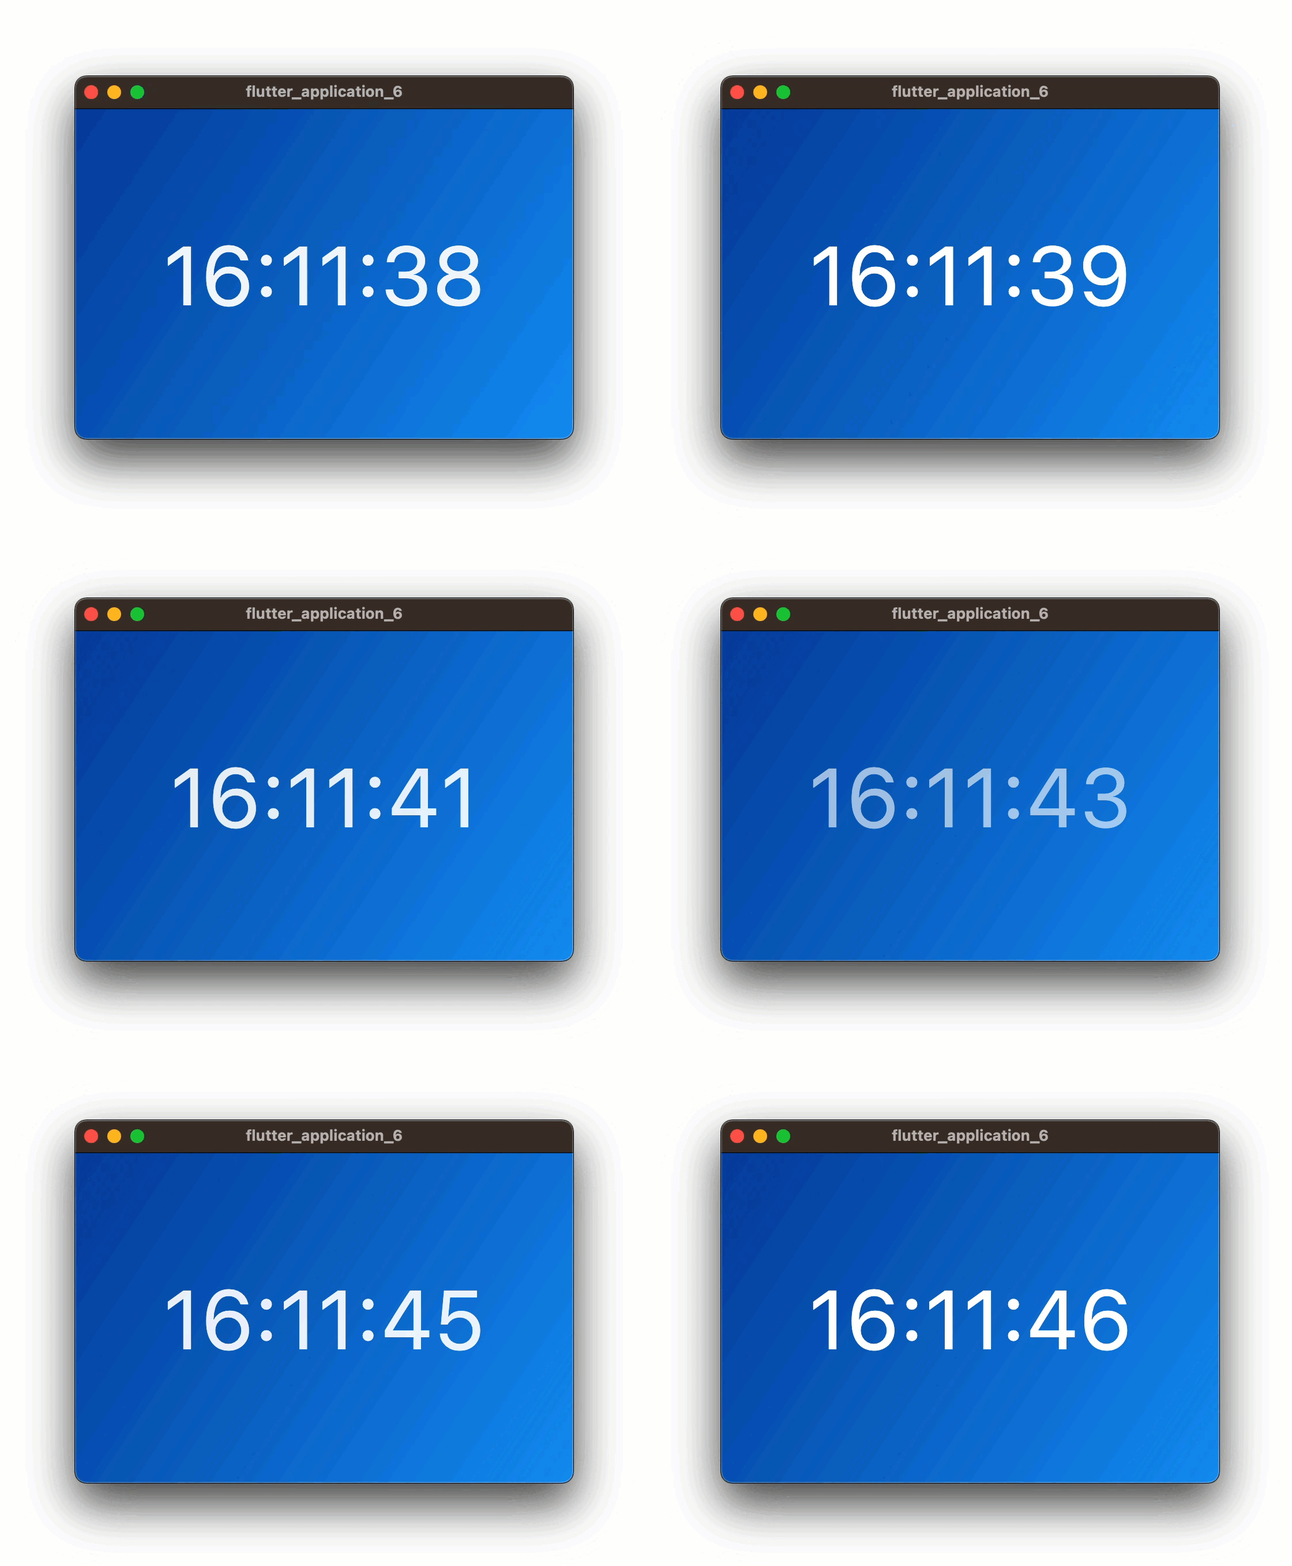
This Flutter app below displays a clock that updates every second with an animation. The clock displays in the center of the screen with a gradient background of blue shades. The animation uses a TweenSequence, which is an interpolation between two values of the same type. This creates the pulsating effect of the clock.
In this case, the values interpolate between opacity values of 1.0 and 0.1 and vice versa, and it repeats in a loop. The AnimatedBuilder widget rebuilds every time the animation updates and its child, AnimatedOpacity, fades the clock in and out with the changing opacity values of the animation. The clock itself updates on a timer every second, and the updated time is formatted into a String and displayed in white text with a font size of 72.0. The dispose method is used to dispose of the AnimationController to avoid memory leaks.
Check out the live sample here
import 'dart:async';
import 'package:flutter/material.dart';
import 'package:intl/intl.dart';

void main() => runApp(const MyApp());

class MyApp extends StatefulWidget {
  const MyApp({super.key});

  @override
  State<MyApp> createState() => _MyAppState();
}

class _MyAppState extends State<MyApp> with SingleTickerProviderStateMixin {
  late String _timeString;
  late AnimationController _controller;
  late Animation<double> _animation;

  @override
  void initState() {
    super.initState();
    _timeString = _formatDateTime(DateTime.now());

    Timer.periodic(const Duration(seconds: 1), (Timer t) => _getTime());

    _controller = AnimationController(
      vsync: this,
      duration: const Duration(milliseconds: 400),
    );

    _animation = TweenSequence([
      TweenSequenceItem(tween: Tween<double>(begin: 1.0, end: 0.1), weight: 1),
      TweenSequenceItem(tween: Tween<double>(begin: 0.1, end: 1.0), weight: 1),
    ]).animate(_controller);
  }

  void _getTime() {
    final now = DateTime.now();
    final formattedTime = _formatDateTime(now);

    if (formattedTime != _timeString) {
      setState(() {
        _timeString = formattedTime;
        _controller.forward(from: 0.0);
      });
    }
  }

  String _formatDateTime(DateTime dateTime) {
    return DateFormat('HH:mm:ss').format(dateTime);
  }

  @override
  Widget build(BuildContext context) => MaterialApp(
      debugShowCheckedModeBanner: false,
      home: Scaffold(
        body: Container(
          decoration: BoxDecoration(
            gradient: LinearGradient(
              begin: Alignment.topLeft,
              end: Alignment.bottomRight,
              colors: [
                Colors.blue.shade900,
                Colors.blue.shade500,
              ],
            ),
          ),
          child: Center(
            child: AnimatedBuilder(
              animation: _animation,
              builder: (context, child) {
                return AnimatedOpacity(
                  opacity: _animation.value,
                  duration: const Duration(milliseconds: 400),
                  child: Text(
                    _timeString,
                    style: const TextStyle(
                      fontSize: 72.0,
                      color: Colors.white,
                    ),
                  ),
                );
              },
            ),
          ),
        ),
      ),
    );

  @override
  void dispose() {
    _controller.dispose();
    super.dispose();
  }
}
Wrap-up
Flutter’s animation framework makes it easy to create complex animations with relatively little code. Tweens are an essential part of Flutter animations. The AnimationController and AnimatedBuilder widgets are also critical components for creating animations. This article demonstrated how to use tweens to create basic animations and provided two examples of Flutter animations: changing the opacity of a FlutterLogo widget and creating a clock that fades in and out. You can build on this to build more complex animations and transitions.
Photo by Skitterphoto from Pexels